Setting up Hardware && Software [Homelab 2.0]
Introduction
After we’ve successfully chosen what components we want to use and what software to run, we can start building it.
In this post I’ll show you how to
Hardware
- mode Fractal node 304 front panel to fit 200mm noctua fan
- put all components together
- connect new power button to the motherboard
Software
- flash bios on Cwwk q670 plus [optional]
- do basic BIOS configuration on Cwwk q670 plus
- install/configure proxmox hypervisor
- import/create ZFS pools (SSD pool for apps, HDD pools for NAS storage)
How to
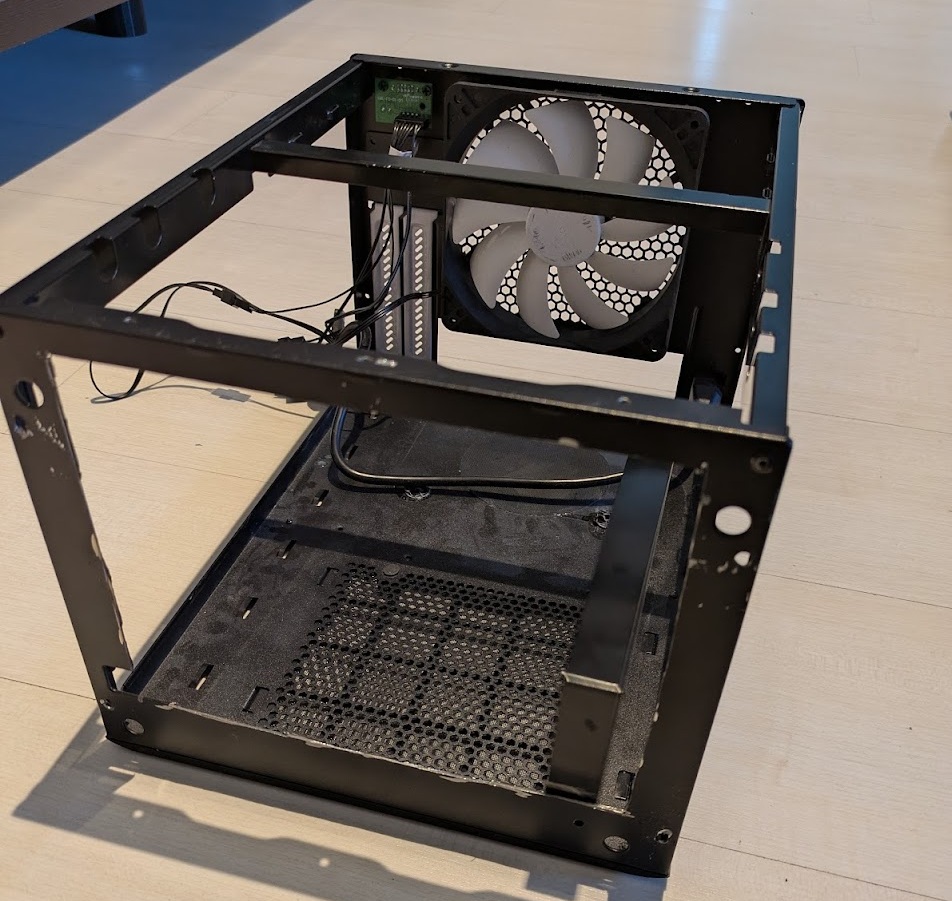
Mode Fractal node 304 front panel
The original Fractal node 304 comes, with the fully covered front panel. I’ve found this to be extremely bad for the airflow in the case, so I decided it has to go.
Fortunately, there is a relatively easy solution (which also looks amazing!) and we can put big 200mm noctua fan in.
I’m talking about this Node 304 front panel mod by pixelwave, which also made its appearance in Wolfgang NAS building video
- cut the hole
- print the parts
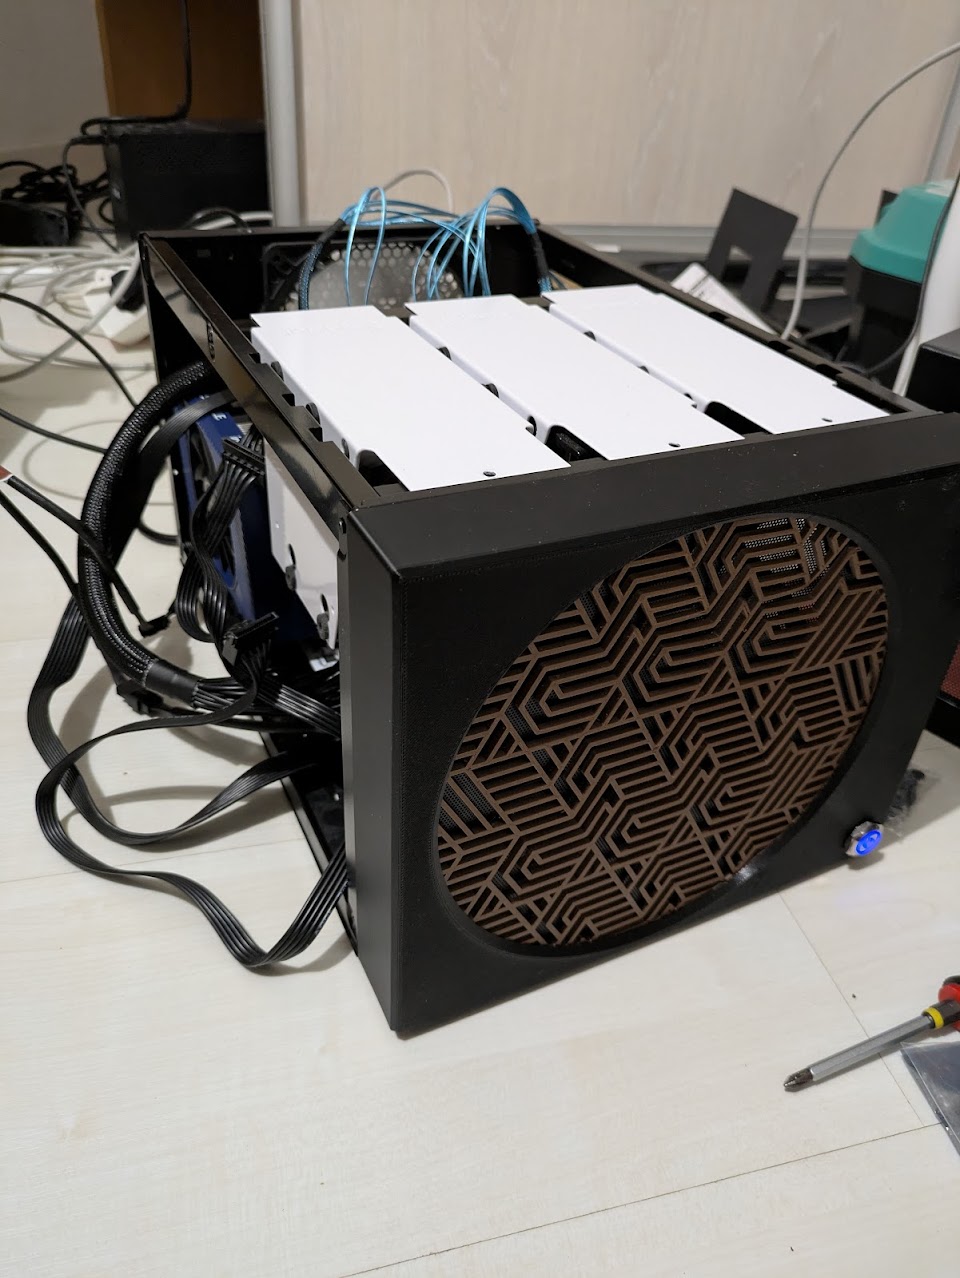
I went with the black/brown color combination in the classic Noctua color scheme.
If you look closely, I’ve put one more PVC mash filter behind brown 3d printed one, to keep the dust out.
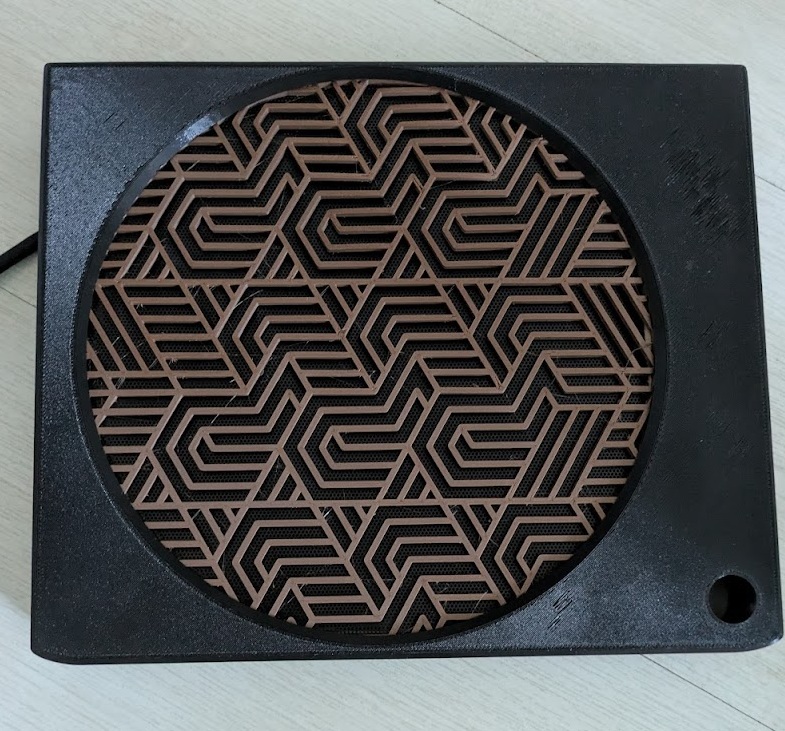
You can find some amazing color combination ideas in the comments as well!
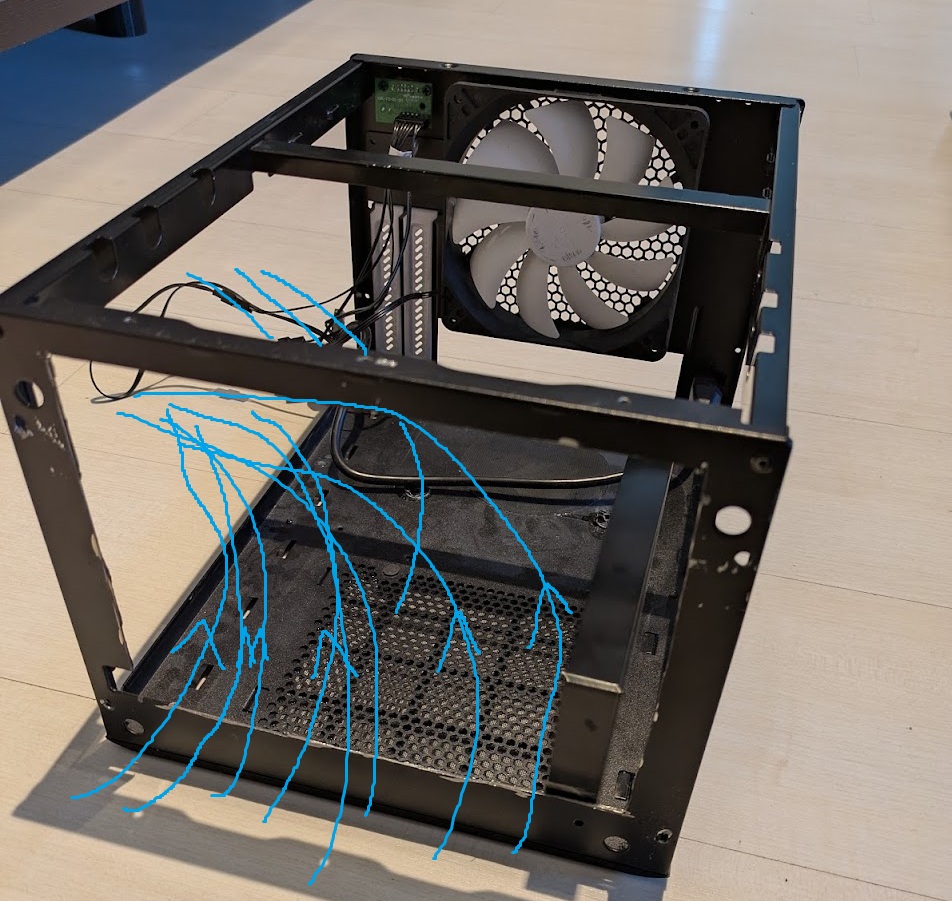
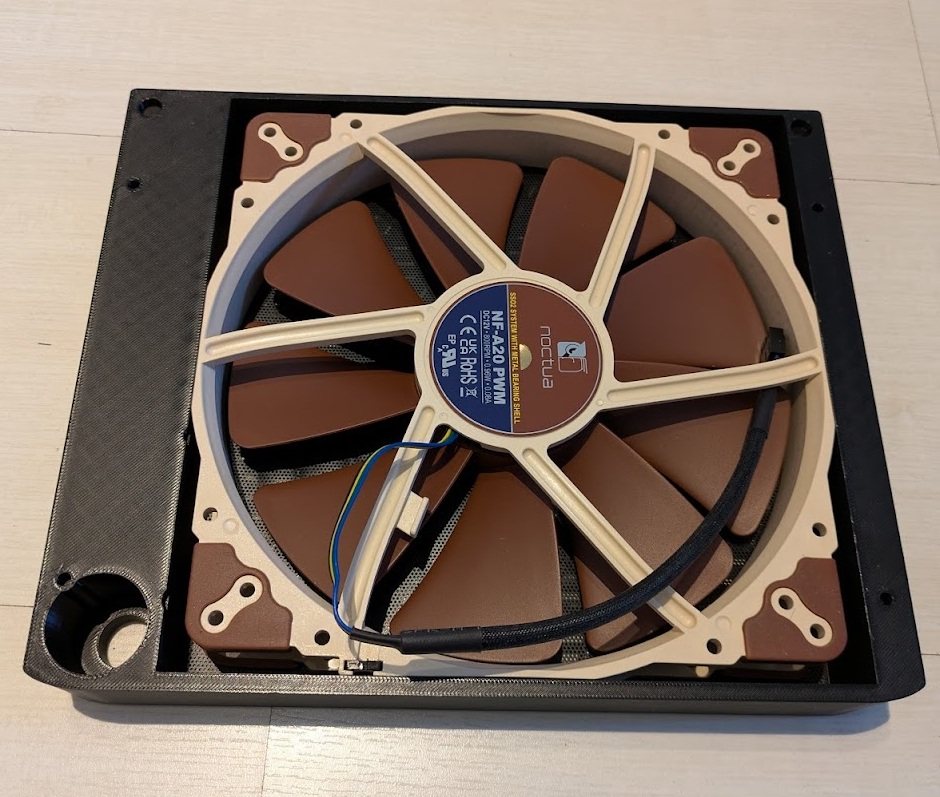
- put the Noctua fan in
Be mindful of the orientations. Follow the arrows on the fan. So the air is getting pulled from the front panel and pushed to the case to left where the exhaust is
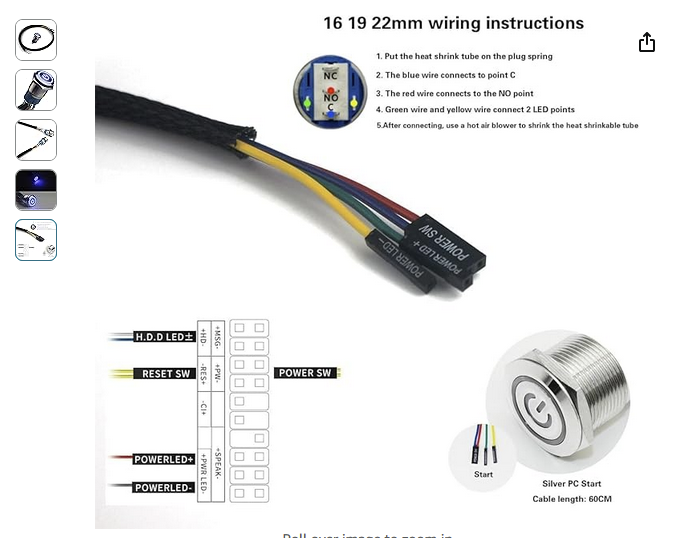
- put the power button in the case
You can buy the same button I’ve used from amazon
Simply push the power button in the the front panel hole and connect the cables, as you can see in the picture.

Put all components together
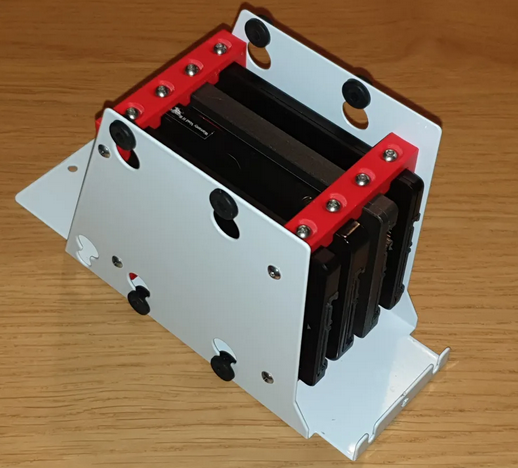
Put the disks inside the “white sockets”
For SSD I’ve used this SSD caddy 3d printed mod from @DrJekyll_242009
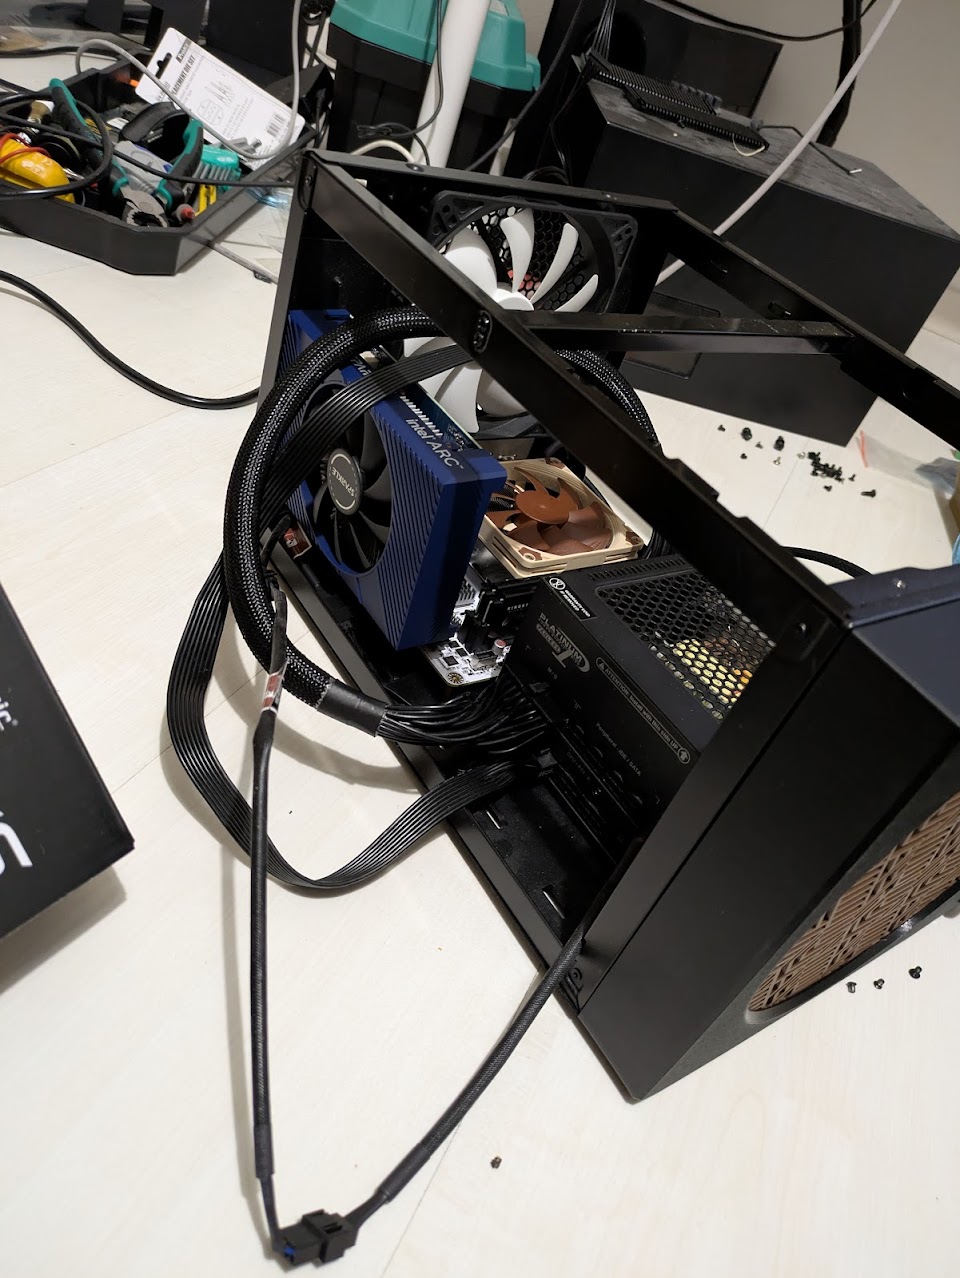
Insert CPU, cooler, RAM, GPU to the motherboard.

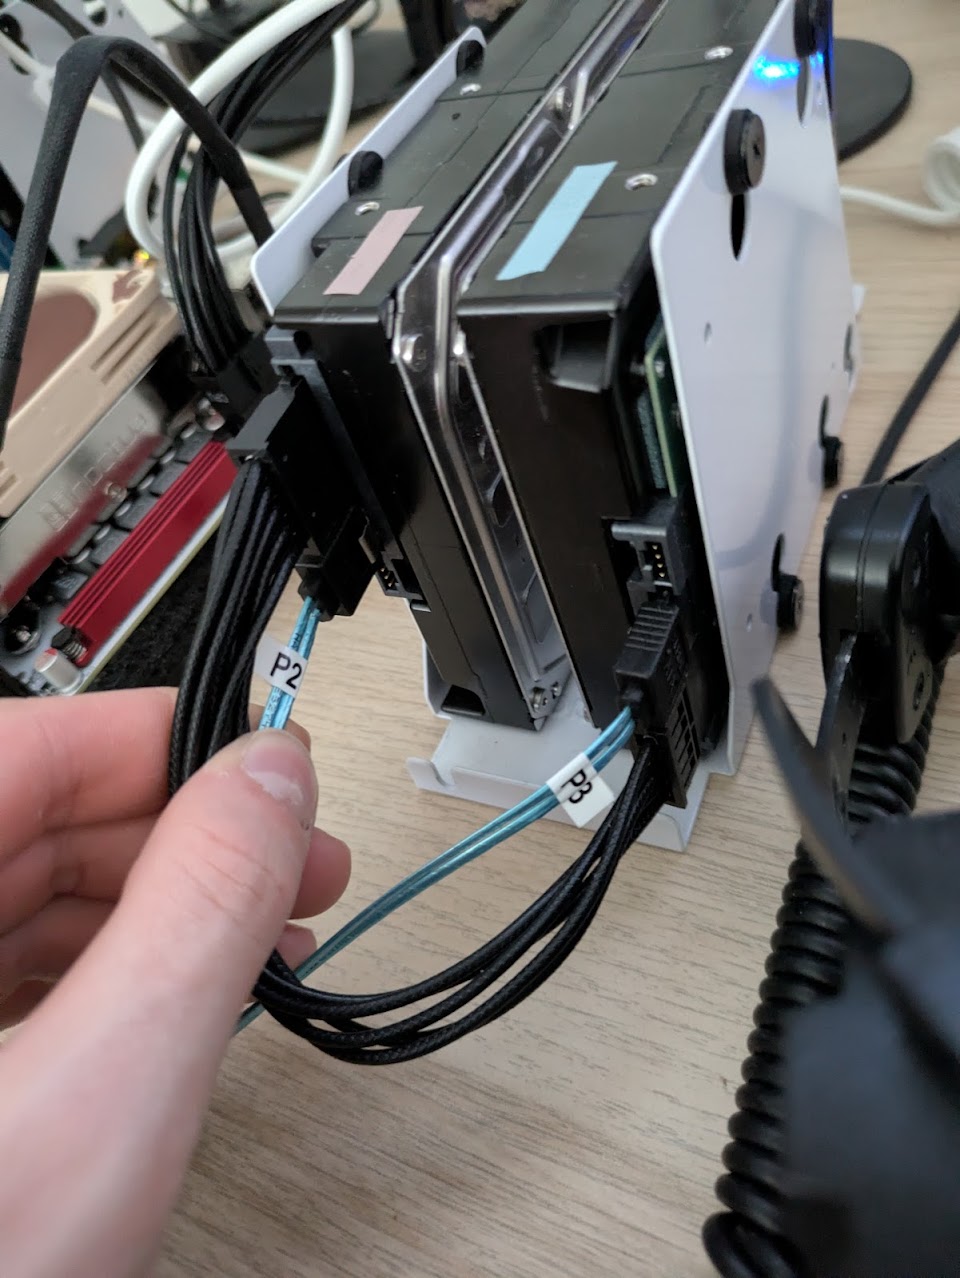
Put PSU in the the case and attach all the power cables to motherboard and disks.
The motherboard requires both 24pins+8pins ATX 12V 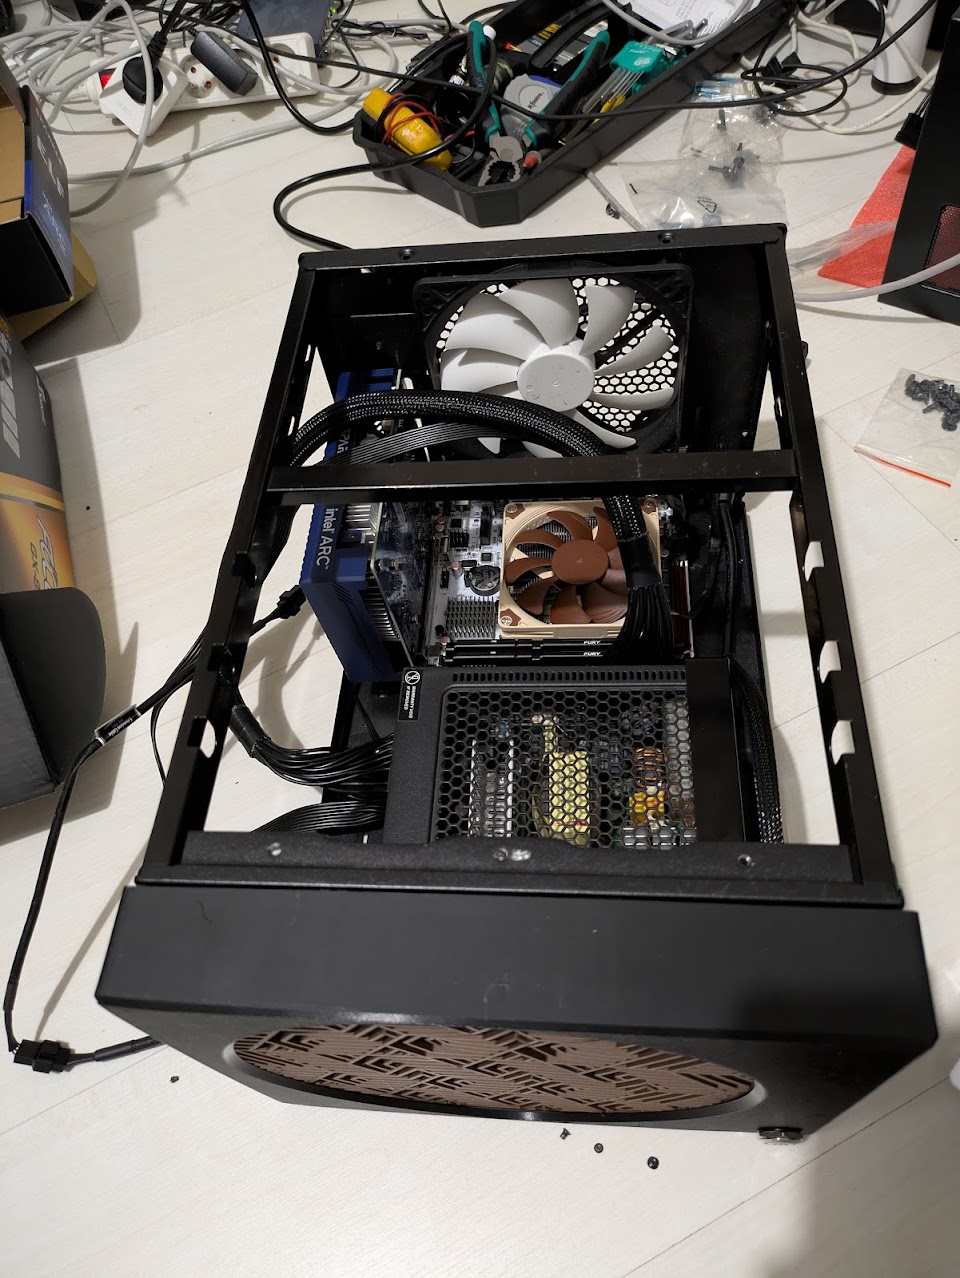
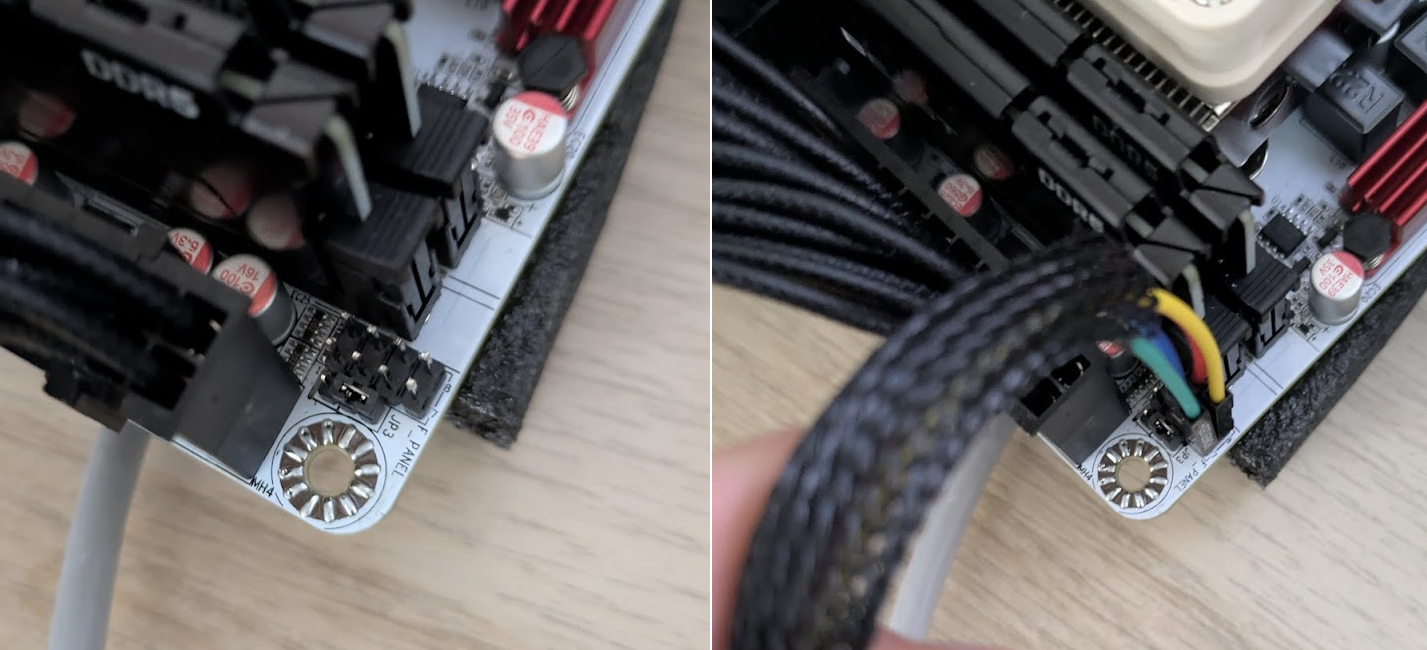
Connect power button to motherboard
Basic BIOS configuration
PDF manual to the older version of the same motherboard.
For better power efficiency we can enable C states.
In order to save energy when the CPU is idle, the CPU can be commanded to enter a low-power mode. Each CPU has several power modes and they are collectively called “C-states” or “C-modes.”. The lower the state the deeper the sleep is and the less power the CPU takes.
Advanced > Power & Performance > CPU > C states = Enabled Advanced > Power & Performance > CPU > Package C state Limit = C10 Auto start on boot = Enabled
I didn’t find any other BIOS settings to make notable difference.
To enable features like ASPM, you need to used edited BIOS (or edit BIOS yourself) -> follow bellow
Flash bios on Cwwk q670 plus [optional]
Cwwk has disabled multiple settings in the BIOS (like ASPM, SATA DevSlp …) because of problems related to that setting features (instead of fixing it..)
Fortunately, the community got together once again and created new edited BIOS version with re-enabled features.
This may potentially brick or make device buggy, so do this on your own risk.
Download default (non-edit version) [11/18 firmware] from cwwk website
Flash the default version to the USB (with something like rufus)
Download edited BIOS version created by Yonji1 from google drive
replace the files on the flashed USB
boot the system with USB inserted to flash
Now you should be able to use ASPM. Just be careful, because users has reported errors like
1
errors like 'pcieport 0000:00:1d.0: AER: Corrected error received' #on the nvme slot
1
2
3
4
5
- It looks like ASPM substates are not really working, L1 seems to be fine but L1.1 and L1.2 probably doesn't work (are grayed out in BIOS). I even forced it with nvram default settings to L1.1 & L1.2 but no difference really.

- NVME in front slot looks to be working with L1.

- PCIE root #3 (and #2 too probably) are the ones for network card. If you enable ASPM there most likely you won't be able to get your network interface up.
1
Looks like Intel I226-V is limiting ASPM. Trying to activate ASPM causes a system freeze. Not sure what is the cause of this
If anything happens, just fall back and flash to default BIOS version
Edit BIOS yourself
With this free opensourced UEFI-edit tool you can even edit BIOS yourself. Here is a little guide that can help you get started.
Install/Configure Proxmox (PVE)
There is A LOT of guides telling you how to install/configure proxmox so I’ll be brief
download the newest PVE ISO
flash the iso to USB (with something like rufus)
boot system with USB inserted
install the system on desired IP, drive (mine being 512GB SSD)
- login at https://
:8006 Post-install configuration
We are going to run few post install proxmox scripts created by community (previously by tteck)
- Proxmox VE Processor Microcode
ZFS introduction
The best article on ZFS I’ve come across by far arstechnica
It explains the whole zfs structure (pool, vdev, dataset, blocks…), how copy-on-write works and many more, so everything I would write here would just be copy or inferior explanation.
Just remember, that you issue “zfs” commands against datasets and “zpool” commands against pools and vdevs.
Import/Create ZFS pools
We will create/import 2 pools
- pool-fast (SSD storage for all LXCs’)
- pool-01 (main HDD storage that will contain stuff like photos, movies..)
create ZFS pool
Go to node -> Disks -> ZFS -> Create: ZFS Choose name, raid level.
We can create pool either over CLI or GUI
GUI
Datacenter -> Storage -> Add -> ZFS
CLI
1
2
3
4
5
#create mirror pool
zpool create pool-01 c1t0d0 c1t1d0

#create raid pool
zpool create pool-01 raidz c1t0d0 c2t0d0 c3t0d0
Import [optional if not creating new]
- in proxmox node shell (CLI) type ```bash #to list all possible options (if there are multiple) zpool import
#specify which pool to import zpool import
#If the pool was not cleanly exported, ZFS requires the -f flag to prevent users from accidentally importing a pool that is still in use on another system zpool import -f
1
2
3
4
5
6
7
8
9
10
11
12
13
14


#### Create zfs dataset
ZFS datasets are a powerful and flexible organizational tool that let you easily and quickly structure your data, monitor size over time, and take backups.


We can either create dataset over CLI or GUI
##### GUI
Datacenter -> Storage -> Add -> ZFS

##### CLI
```bash
zfs create pool-01/test
zfs list pool-01/test
In later post I’ll explain to you possibility of installing software like cockpit to manage your ZFS share and permissions.
ZFS scrubs
Should be enabled on proxmox by default. You can check by running
1
crontab -e
Conclusion
With the hardware mods and software configurations now in place, your Homelab 2.0 setup is ready to go. In the following posts, I’ll show you what LXC I’m running and how to install/configure them!