Automatically controlled Fan on the Raspberry PI
With the new Raspberry Pi 4 and it’s CPU, Raspberry tends to get really hot. Adding a fan can significantly help this problem, but there is going to be an issue with the annoying buzzing sound of the small fan.
In this guide, I’ll show you how to set up this fan, so it’s only starting working when the PI will get hot.
1. First, you will need a few things:
- Raspberry Pi (any model will do for this)
- SD card / USB
- Power supply
- Ethernet Cable (you could also you a wifi, but Ethernet is just way better in performance and reliability
- Small fan – 5V
- Few cables and soldering iron
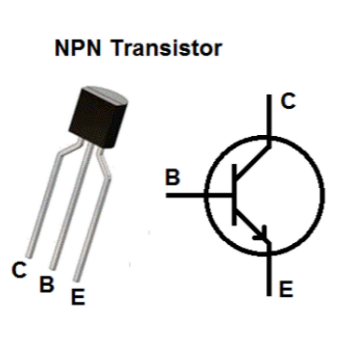
- NPN transistor (2N2222) – 680Ω
2. Set up your your PI.
You can find guide for the Raspberry PI setup on this blog as well.
3. Connecting the circuit
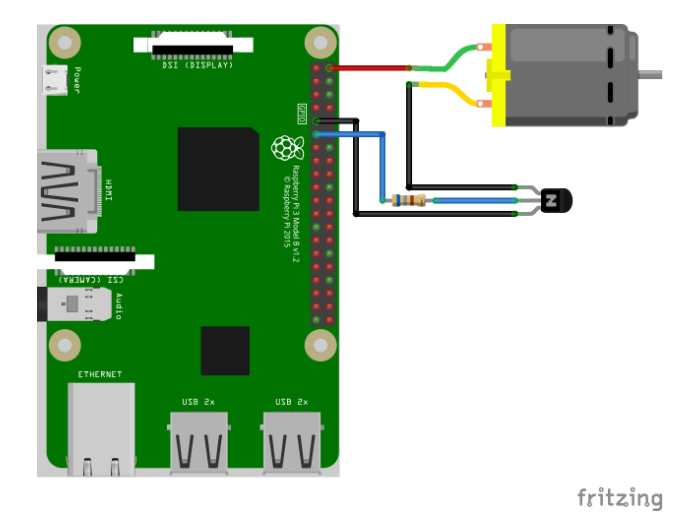
In this step, I’ll explain the circuit and a step-by-step guide to connecting it right.
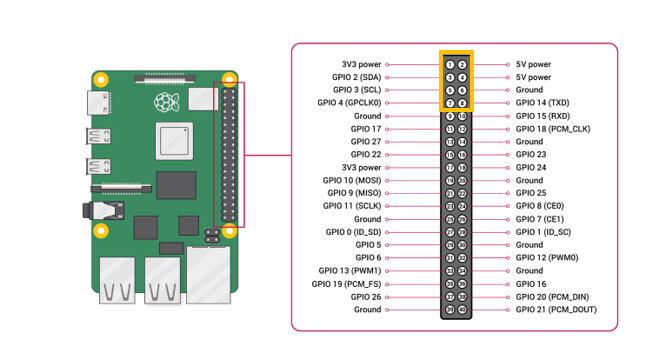
Because the fan requirement of the 5V and the Pi capability of providing 3.3V at max, we added a NPN transistor. We could just use dedicated 5V pins that are on the PI, but they don’t have regulation capability build into them. That’s why we are going to use GPIO pins.
The transistor is an electrical component used in circuits to switch or amplify power. In our case, it’s going to be switch.
We are going to connect the positive lead aka Emitor (E )to 5v+ on the PI and the collector (C ) to the ground on the PI. Last but not least, we are going to connect the base (B ) of the transistor to the PIN 17 and place a 680 Ohm resistor between them. You can see which leg of the NPN transistor is what on the picture below as well as the GPIO name scheme of the PI
Finally, the final wired up product should look like this.
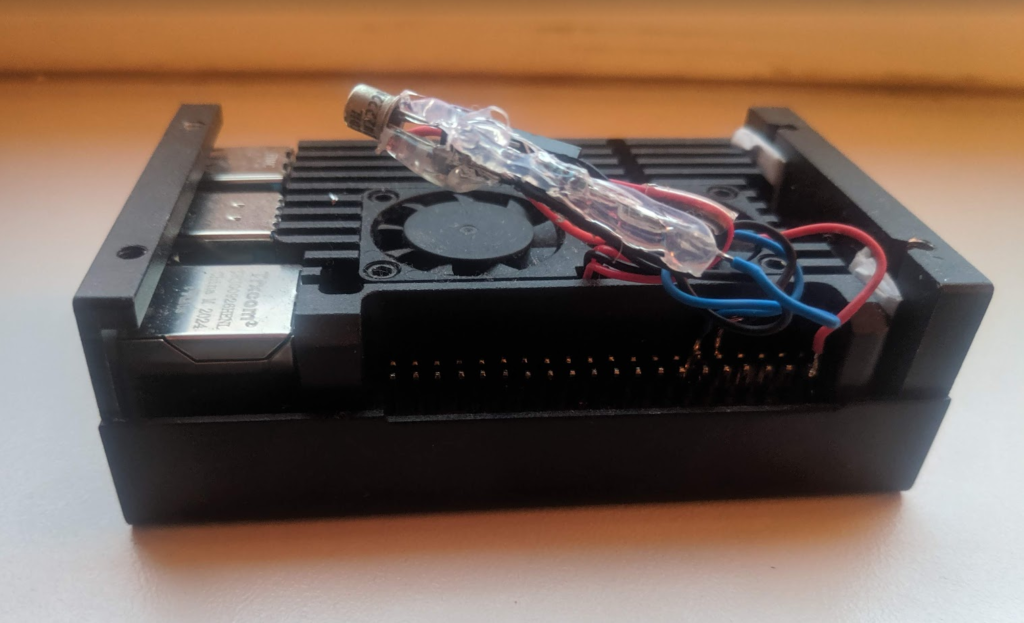
Here is my PI with the hot glue used to keep everything together and protected. It doesn’t look the nicest, but it gets the job done, and it’s pretty reliable.
4. Script for a fan
First, we will need to install a python 3 for our script to work.
1
sudo apt install python python3-pip git -y
Next, we will be using a script that some gentleman already wrote for us. Just copy and paste this command into your PI
1
git clone https://github.com/Howchoo/pi-fan-controller.git
We will need to install a few more packages, this process is already automated, so you just have to type
1
sudo pip3 install -r pi-fan-controller/requirements.txt
And finally start the script, that will automatically configure everything
1
./pi-fan-controller/script/install
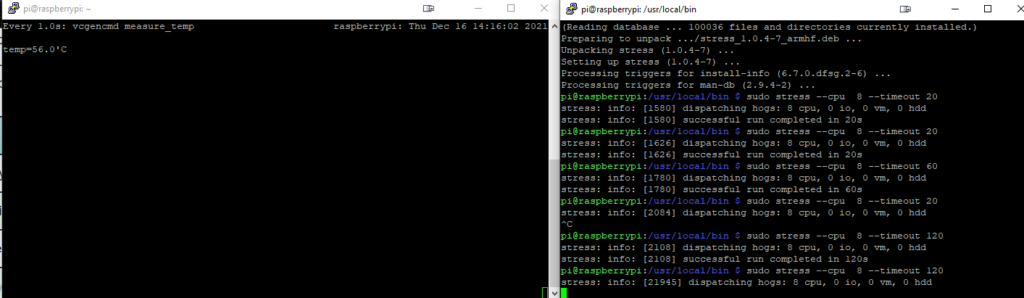
Everything should be working now. To test this, we will use a stress test and measure the temperature along with it. In one terminal type:
1
2
sudo apt-get install stress
sudo stress --cpu 8 --timeout 60
And in the other window terminal we will measure the temperature and watch fans if they spin on in time:
1
watch -n 1 vcgencmd measure_temp
If everything goes correctly, a fan should turn on when temperature hits the 65° C
You can change the threshold of the fan settings by opening “fancontrol.py” config file and rewriting the temperatures:
1
sudo vi /usr/local/bin/fancontrol.py

Your Pi should now be able to automatically control the fan, so both of you can be cool now.