Backup your wordpress site with rsync
What is rsync
Rsync (short for remote sync) is a unix-based tool, that is used as remote and local file synchronization. Rsync is great for complex file syncs and for transferring large numbers of files.
The main advantage of rsync is what is called a delta-transfer algorithm which compares files from the source and destination and sends only the differences between them.
This means that if you have a large database on server 1, and you copy it to server 2, the first transfer will be normal, but subsequent transfers will be much faster. Which makes it great for backup
Installation
Depending on your OS you will either use apt-get or dnf
1
2
sudo apt-get install rsync
sudo dnf install rsync
Create SSH keys
For establishing a secure connection between two servers, it’s always recommended to use SSH key pairs, which are the most secure way to us SSH connection.
But why keys and not credentials, you may ask?
Usernames and passwords have to be directly transmitted to the server being logged into, thus making this method more prone to hacking. You are also storing your password in plain text, which is also terrible idea.
How to generate a key pair
Server 1
1
ssh-keygen
and just use defaults with enter key. If you feel like you know what are doing feel free to change it.
Once you are done, the SSH key ssh should be generated and stored in ~/.ssh/ (where ~ is your home directory and has a different name)
By default, the generated key’s algorithm type is RSA, and its bit size is 3072 bit. But you can change it if you want. I’ll make tutorials on this in the future and go over differences and pros and cons, but for now, just mind that it’s RSA .
Now you have to copy the public key to the server 2. There are multiple ways to do it, I’ll show you two:
a) Type this command into server 1 terminal (of course change username and IP address)
1
ssh-copy-id username@host-ip-address
b) Or simply just copy
1
cat /home/username_home/.ssh/id_rsa.pub
and paste it into the server 2. Also, don’t forget to reload ssh service.
1
2
vim ~/.ssh/authorized_keys
systemctl reload sshd
You should be able to connect now to the server 2 from server 1 without using password. You can try it and verify. Also if you want to go from server 2 to server 1 without password as well you need to repeat the process from other server.
Add devices to the VPN network (Optional)
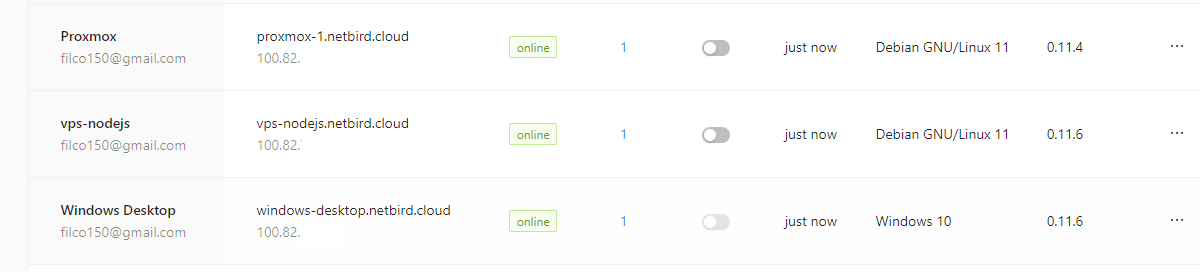
Because of attacks like man-in-the-middle and many many more… it’s a good practice to use VPN network to back up data. There are many VPNs out there, but I prefer and use Netbird, and I’ve already made a tutorial on it here!
Also, it’s very useful if you don’t have public IP address, which would make you set up port forwarding on your router and complicate all things.
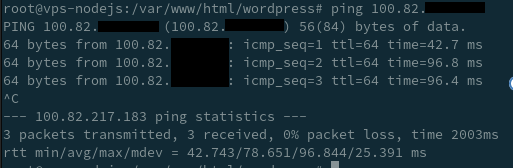
When you are done with the Netbird steps, and you can see all your peers in the browser console, try pinging the IP of server 1 (backup server) from server 2 (server we want to backup from) and vice-versa.
Rsync syntax
1
rsync [option] [origin] [destination]
We will use few additional flags as well
1
rsync -avz --exclude source_destination ssh_host:destination_path
Note : In rsync command -a option is used for archiving during the copy or sync and apart from archiving -a option is also used for followings:
- recursively copy files and directory
- copy symlinks as symlinks
- preserve permissions
- preserve group
- preserve modification time
- preserve ownership
-v for verbose because default is silent transfer, but this gives you info about where the data is going and a summary at the end
- -z for compress (before data transfer the data is compressed which lowers the size and therefore time that is being sent over the internet) There are levels of compression from 1-9 (1 is the least compressed and fastest, 9 is the most compressed therefore slowest to compress). The default is 6, so let’s stick with that.
Daily backup of a WordPress site
Let’s try this on a real life example. You can see below the script which will do daily backup of WordPress site to my proxmox storage server.
The script will be run on the wordpress server VM and it will PUSH the data, to the backup server.
1
2
3
4
5
6
7
8
9
10
11
12
13
14
15
16
17
18
19
20
21
22
23
24
25
26
27
28
29
#!/bin/bash

#backup script for wordpress site
#Run the script on the wordpress VM
#using WP CLI && rsync incremental backups

#requirements: ssh keys, rsync and WP CLI installed

#variables
destination_ssh_host="user@IPaddress"
source_path="/var/www/html/wordpress"
destination_path="/root/backup/"
WPCLI="~/bin/wp"
EXCLUDE="/var/www/html/wordpess/wp-content/cache/*"
EXCLUDE2="/var/www/html/wordpess/wp-content/error_log"


#export database using wp cli (you can also use mysql it doesnt really matter)
$WPCLI db export  | $source_path --allow-root

#rsync all of the files to the remote server
#with the exception of cache and error_log
#rsync flags: a-archive, v-verbose, z-compress

rsync -avz --exclude $EXCLUDE --exclude $EXCLUDE2 $source_path $destination_ssh_host:$destination_path

#add script to the crontab (run once a day at 00:00)
#crontab -e
#0 0 * * *  /root/backup_script.sh
Change variables
To be able to use this on your network you need to change a few things. All of them are in the variables section.
1
2
3
4
5
6
#  Change to your user@IP
destination_ssh_host="user@IPaddress"
# Change to your source path of the wordpress site
source_path="/var/www/html/wordpress"
# Change to your destination path on the backup server
destination_path="/root/backup"
Add the script to the crontab
After you are done changing variables, save the script wherever you want (I’ll save mine in the root directory as /root/backup_script.sh) and then type
1
crontab -e
And add this line to the file
1
0 0 * * *  /root/backup_script.sh
This will make it so, it runs every night at midnight.
Conclusion
Congratulation, you are now protected from ever losing your precious data. Well, at least somehow… According to the good practices rule book, you should follow 3-2-1 backup rule and that’s something you can certainly do, but not here in this tutorial, so have a nice day!