Build a cloud-init enabled Linux VM templates on Proxmox provisioned by packer [Part 1]
Introduction
In the past, I’ve already written about cloud-init and how you can use it to it easily deploy new configured VMs. Check out the post here.
It just had one small problem. To make them up to date, from time to time, you had to manually clone, run the updates and again create templates from them.
If you wouldn’t do this, then after some time update/upgrade on the VM boot would took even a few minutes, which defeats the whole purpose of making your life easier with using the cloud-init enabled images in the first place.
To fix this, I combined shell, proxmox CLI and packer to regularly run updates on the templates, so they would be ready and up to date, when you need them. I’ve packed this into easy to clone and re-deploy git repository.
You can the find it on my GitHub.
What’s this project about?
This project builds, configures and maintain cloud-init enabled Linux VMs and transform them into templates on Proxmox hypervisor.
To automate this chain, cloud-init images are used in combination with proxmox CLI and packer.
How does it work?
Service executes the nightly job, which first fetches the latest cloud-init images, then it creates and configures Proxmox VMs.
packercreates templates from newly prepared VMs and configures the templates with cloud-init defaults (SSH user and public key).
You can easily customize this and add more cloud-init defaults. List of all possible defaults
If the systemd service fails for any reason, it’s configured to trigger the notify-email@%i.service. It also sends a notification with proxmox-mail-forward on successful build.
Currently used OSs
- Debian 12 (bookworm)
- AlmaLinux 9 (selinux set to permissive)
- Ubuntu 22.04.3 (Jammy)
Installation
Installation is intended to be done on the Proxmox host itself, otherwise it won’t work.
Install dependencies
1
apt-get update && apt-get install libguestfs-tools wget vim git unzip
Manually install packer
Because I’m using token ID/secret as proxmox authentication method, packer must be install manually to attain newer version than proxmox currently supports as default package. New versions support this authentication method and also fixes a lot of bugs you may encounter.
https://developer.hashicorp.com/packer/tutorials/docker-get-started/get-started-install-cli
TLDR Download the newest version (currently 201.9.4)
1
wget https://developer.hashicorp.com/packer/downloads#:~:text=Version%3A%201.9.4-,Download,-AMD64
Unzip && move the “precompile” file
1
2
unzip packer*
mv packer /usr/bin/
Make sure these VM IDs are not used:
8999, 9000, 8000, 7999, 7000, 6999
Clone the repository
Clone the repository to /opt.
1
2
git clone https://github.com/Ard3ny/proxmox-build-template.git /opt/build-template
cd /opt/build-template
Create token/secret in proxmox
Over GUI
In Proxmox - > Datacenter -> Permissions -> Users -> Add
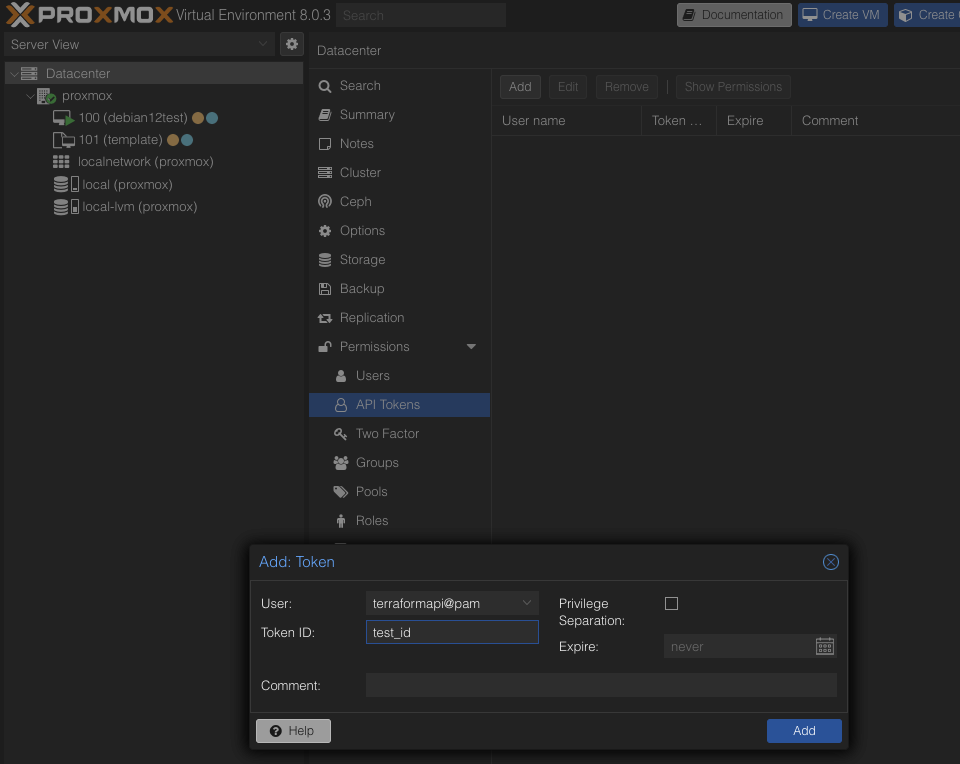
In Proxmox - > Datacenter -> Permissions -> API Tokens -> Add
Make sure privilige separation is unchecked.
When you click add you will get secret and ID info. Save those.
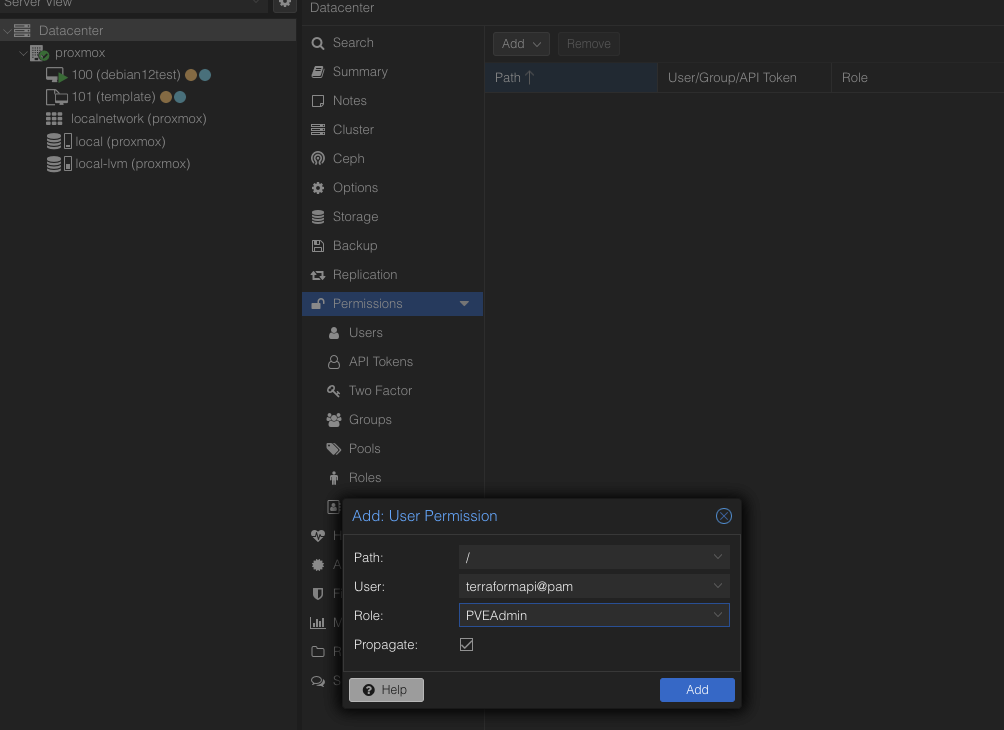
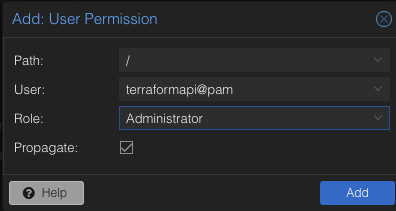
Add permissions for the user
To work properly user needs “PVEadmin” and “administrator” for whole /
Or Over CLI (you dont have to do both)
1
2
3
4
pveum user add kubernetes@pve
pveum acl modify / -user kubernetes@pve -role Administrator
pveum acl modify / -user kubernetes@pve -role PVEAdmin
pveum user token add kubernetes@pve test_id -privsep 0
Complete.
Configuration
Copy the environment variable files and edit them with your own parameters.
1
2
3
cp env .env && cp credentials.pkr.hcl.example credentials.pkr.hcl
vim .env
vim credentials.pkr.hcl
Setup systemd timers
By default, the build-template service runs each night at 00:15.
1
2
3
make install
systemctl daemon-reload
systemctl enable --now build-template.timer
Run it now (for testing)
1
/usr/bin/make -C /opt/build-template
Disclaimer
I’ve forked this project originally created by mfin I’ve fix few bugs, added more cloud-init templates, changed install and authentication methods and extended documentation, so big “shout-out” goes to him.
Useful links
Packer proxmox intregration Virt customize
To be continue
In the next post, I’ll show you how you can use terraform to deploy VMs from this packer provisioned template.


