Set Up Raspberry Pi without monitor (64bit OS)
The Raspberry Pi is a low cost, credit-card sized computer that plugs into a computer monitor or TV, and uses a standard keyboard and mouse. It is a capable little device that enables people of all ages to explore computing, and to learn how to program in languages like Scratch and Python. It’s capable of doing everything you’d expect a desktop computer to do, from browsing the internet and playing high-definition video, to making spreadsheets, word-processing, and playing games.
So basically, the Raspberry Pi is just a small computer that you can program to do pretty much anything with the right sensors and code.
Why 64 bit?
Software compatibility
Simply put, almost all modern software is built for 64-bit. That’s just the way technology is heading and everything has to adapt. Why is the world moving from 32 to 64 is the whole another debate, you just have to know that future support for 64bit applications is gonna be here for much longer.
RAM
But 32-bit OSes can’t address more than 4 gigabytes of RAM. If you have less than 4 gigs of RAM, then memory isn’t a huge concern.
CPU
From some benchmarks I’ve seen, you can get 5-30% faster performance just by running an application with the 64-bit version.
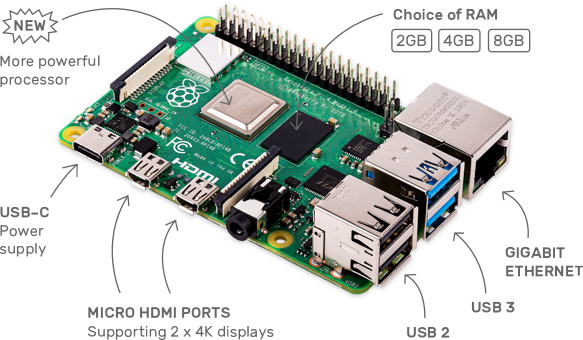
All the necessary equipment you will need
- Raspberry PI (for this guide I will be using Raspberry PI 4 B, but you can use any model)
- Power supply for model you are using (you will need stronger power supply with newer model)
- SD Card or USB Flash Drive
- Network or HDMI cable depending if you want to use monitor or not (for model 4B you will need micro HDMI)
- PC or laptop for downloading the OS and writing the image one SD card / USB
Installing Raspberry Pi OS on Your microSD card
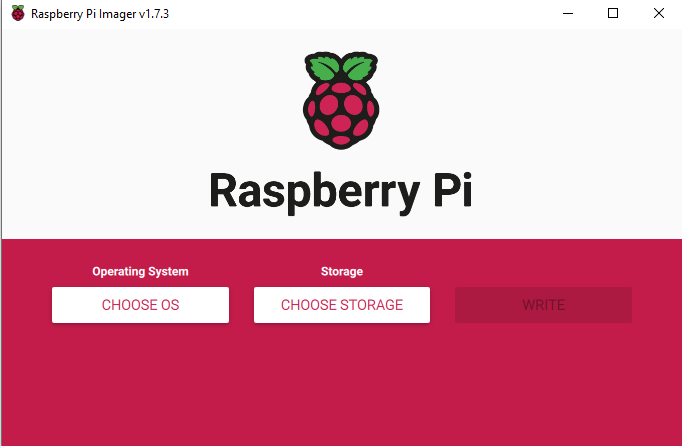
- Insert the microSD card into your PC.
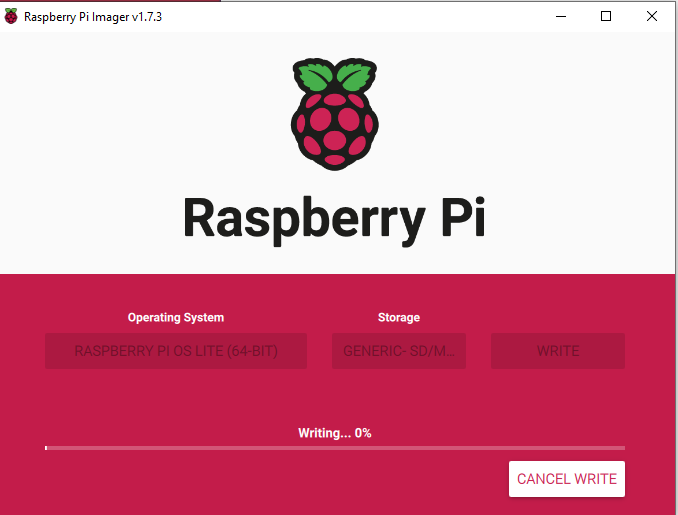
- Download, install and run Raspberry Pi Imager
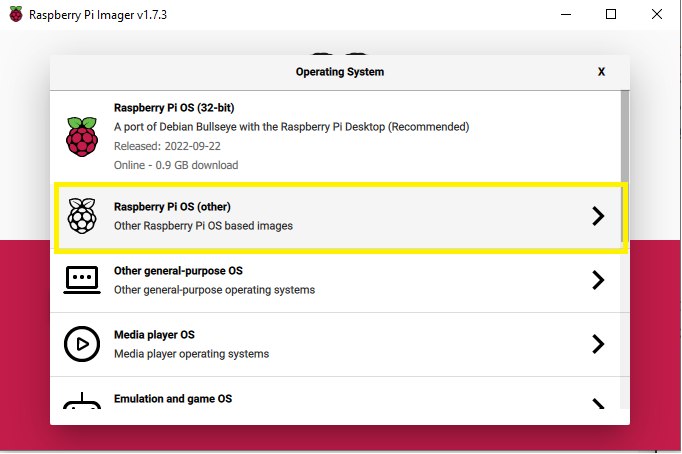
- Click on “Choose OS” and select the Raspberry Pi OS (other)
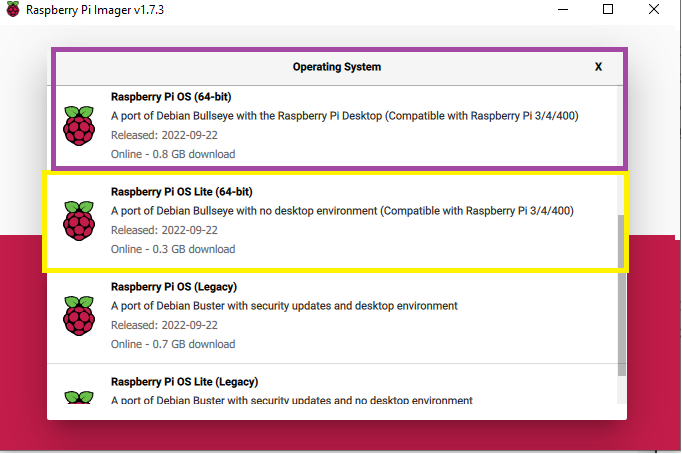
- And choose either Raspberry Pi OS (64-bit) or Raspberry Pi OS Lite (64-bit) depending on your use case. (Lite is without the desktop environment
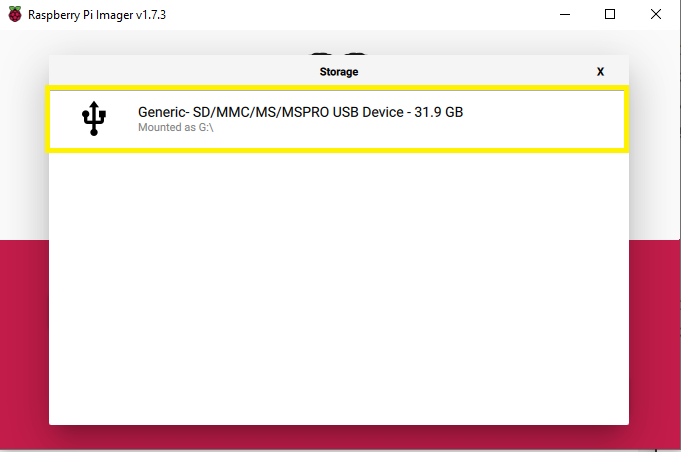
- Now click on “Choose storage” and select your SD Card

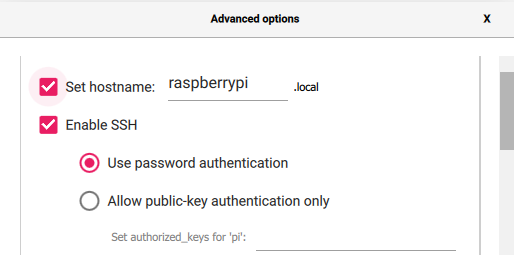
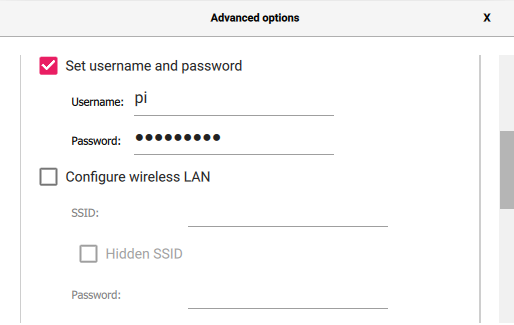
- Now we need to configure our image. We do this by pressing the “wheel button“

Edit the hostname, username and password and allow ssh
And as the last step in this utility, click “write” to begin a process of flashing the image.
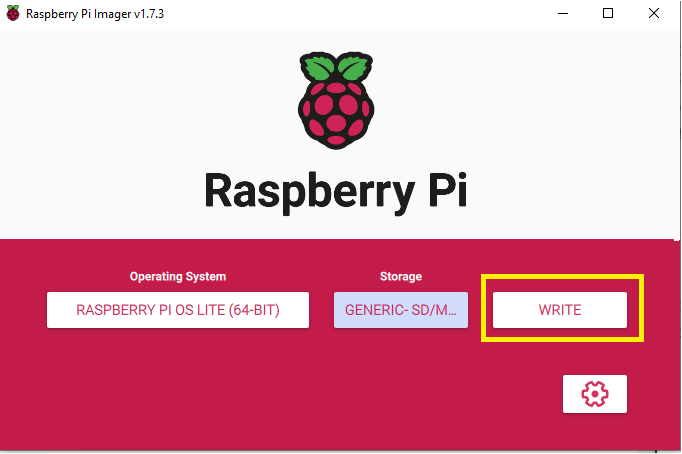
And the process will start. Be aware this can take a couple of minutes depending on your SD card so, go grab a coffee.
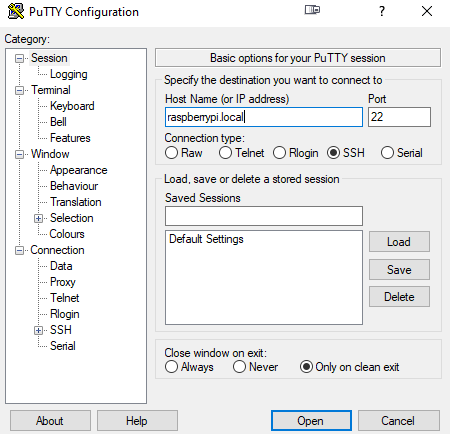
After this you can insert the SD card/USB into a PI, connect all your peripherals (keyboard and mouse) and a network cable. The other side of the network cable connects to your PC.
We will need some sort of SSH client. One of the most popular and user friendly ones is the PuTTY. You can download it here. After you have downloaded and installed PuTTY, type “raspberrypi.local” into a hostname and select port 22. After that just select Open.
After that you will be prompted with the console asking for your login information. The default login and password information are
Login: pi
Password: raspberry
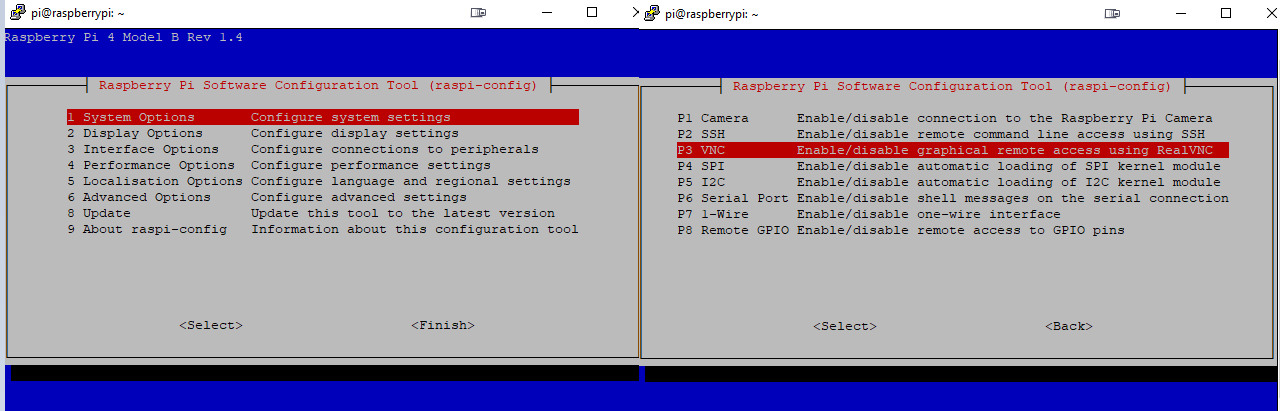
After this we need to enable the VNC interface which allows us to send display output over the network interface. We can do this by typing
1
sudo raspi-config
You will see this menu in which you will select Interface Option and then P3 VNC.
Then go back into the menu again and select System Options and S5 Boot / Auto login and then B3 Desktop.
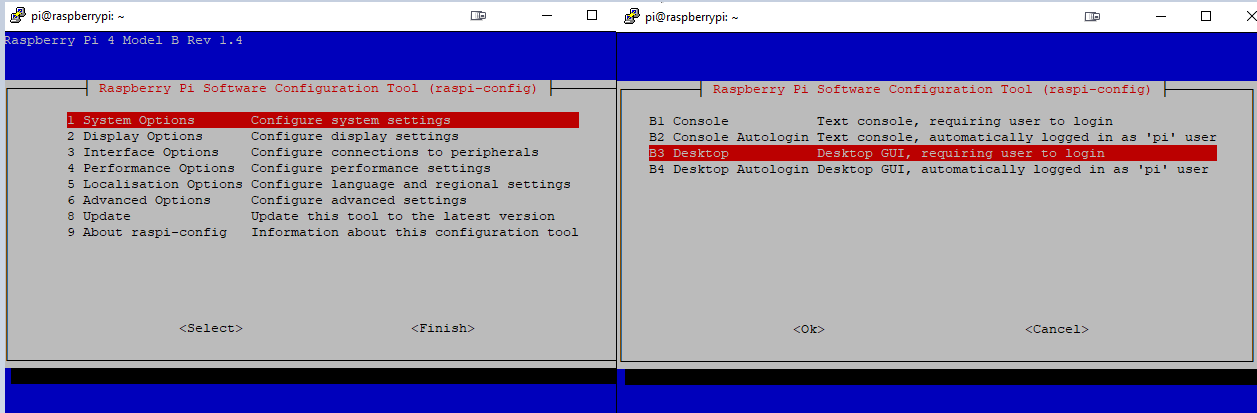
And now just leave the menu with “ESC” and for a reboot type
1
sudo shutdown -r +0
After a few minutes your PI should be up again and we can continue.
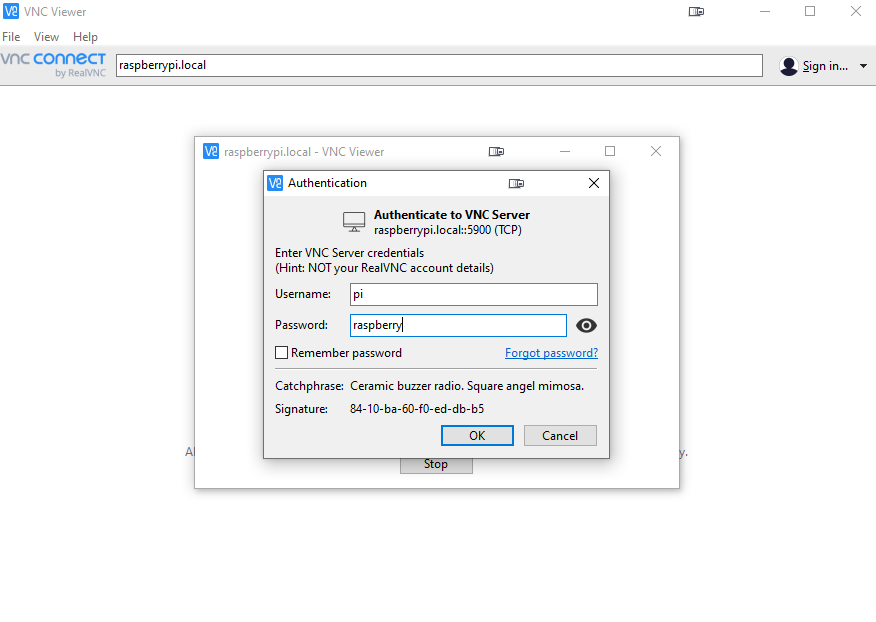
We will need to download the VNC that serves as a virtual bridge to our PI display interface. Install and open the VNC and on the top side of the software type the hostname of our device which we previously entered into the PuTTY is “raspberrypi.local”. Enter our username which is PI and password raspberry and press ok.
Your setup of the Raspberry PI is now completed, and you can fully enjoy it as you would be able to with the connected display over HDMI.