Turn your old laptop into proxmox server
Beginning of your Homelab life
As a first step on your homelab journey, you should set up an environment where you can easily deploy, manage and back up your virtual machines (VMs). Running your services in virtual machines rather than on bare metal hardware is much more efficient, cheaper and overall less difficult.
Hypervisor
There are many types, but for the start let’s split them into the two categories
Type 1 or bare metal hypervisors are installed directly onto the host system’s hardware. You can think of a bare metal hypervisor being like an operating system that is just dedicated to creating and managing virtual machines.
Type 2 or hosted hypervisors are like those you’ve already mentioned. VirtualBox, VMWare Workstation, etc., are hypervisors installed on an existing operating system that lets you run virtual machines on that system. They are not directly managing the hardware of your system, but rely on the underlying OS for that.
It also helps to think of these things in layers. In a type 1 architecture, the layering goes hardware > hypervisor > guest operating system(s).
In a type 2 architecture, the layering goes: hardware > host operating system > hypervisor > guest operating system(s)
My choice of a hypervisor is Proxmox.
1
Proxmox is complete open-source platform for enterprise virtualization. With the built-in web interface you can easily manage VMs and containers, software-defined storage and networking, high-availability clustering, and multiple out-of-the-box tools on a single solution.
It’s very light way compared to other hypervisor with very nice GUI and great community. It’s running a debian so you can use pretty much anything to host your proxmox.
In my case, I’m going to use an old laptop (Asus X550vb) which has been sitting on my shelf eating dust for a few years now.
Preparation
What will you need:
- Something to host on Proxmox (old laptop, desktop..)
- SSD disk for operating system, proxmox and VMs (at least 256GB)
- USB disk for installation of an OS
Installation guide
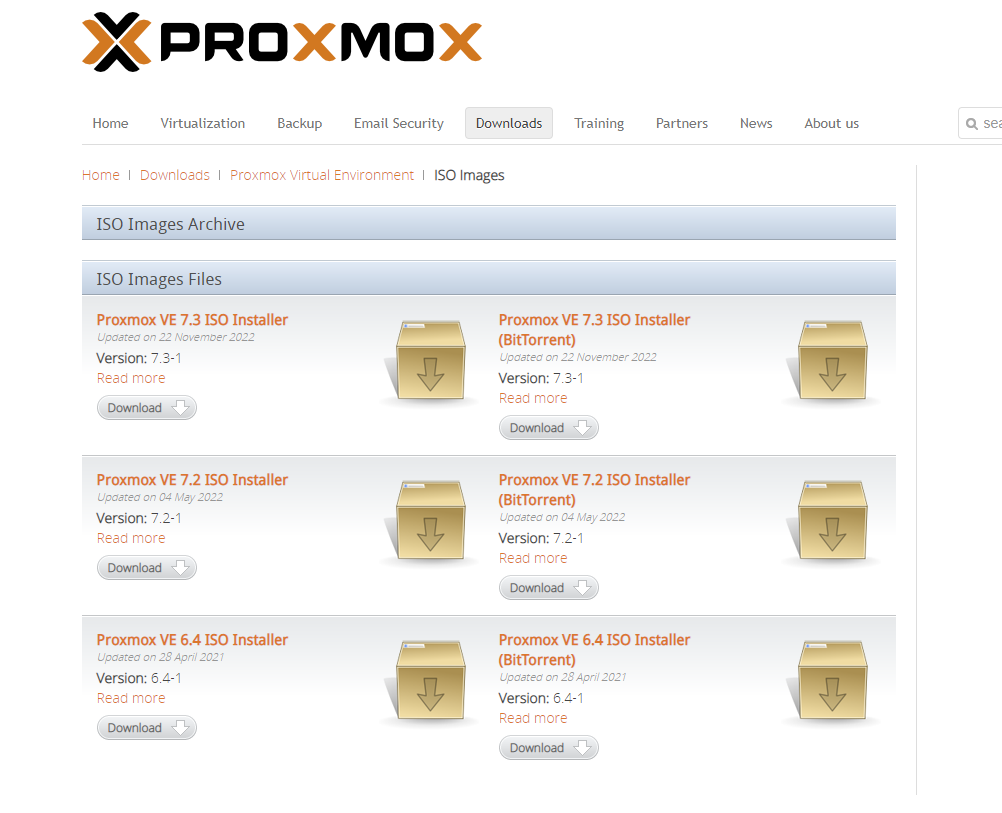
- Download Proxmox You can download ISO from the official site
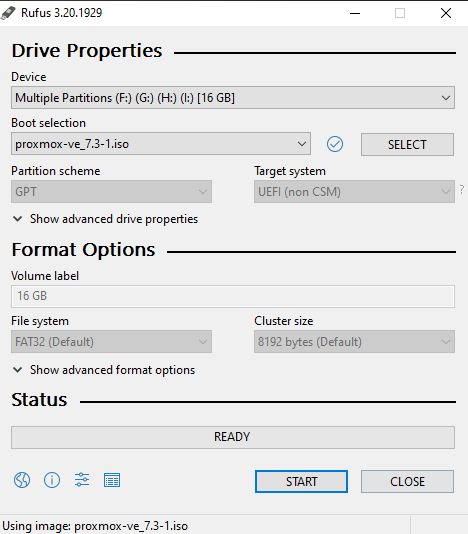
- Flash ISO onto USB
There are multiple ways on how to flash ISO onto USB, but my favorite is using a utility called Rufus
- Stick USB into the laptop and change BIOS boot options
As all the other OS installations, you need to change boot process priority from things like SSD, HDD.. to prioritizing USB input first.
Again, there are countless guides for this, so I’m just gonna put one here and it’s up to you to find one which suits the needs for your specific hardware.
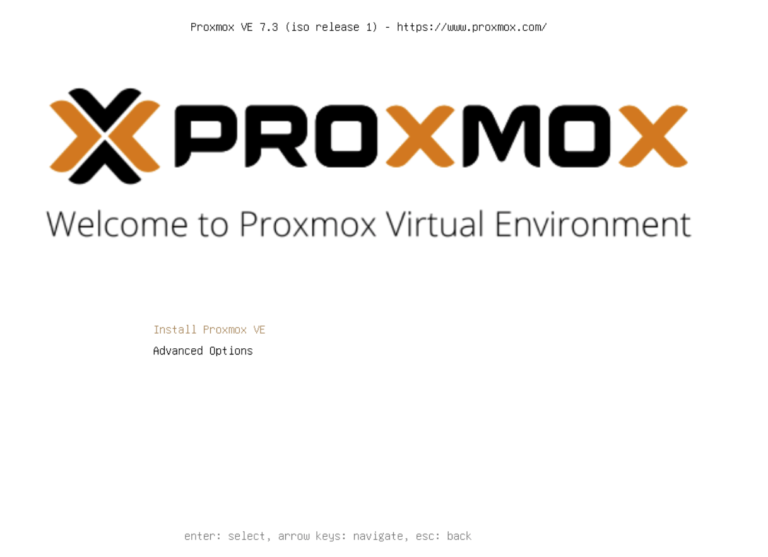
- Complete installation setup Start your laptop/desktop with the USB stick inside and boot priority set for an USB.
You’ll be greeted by this screen. Select install proxmox VE
Accept the EULA 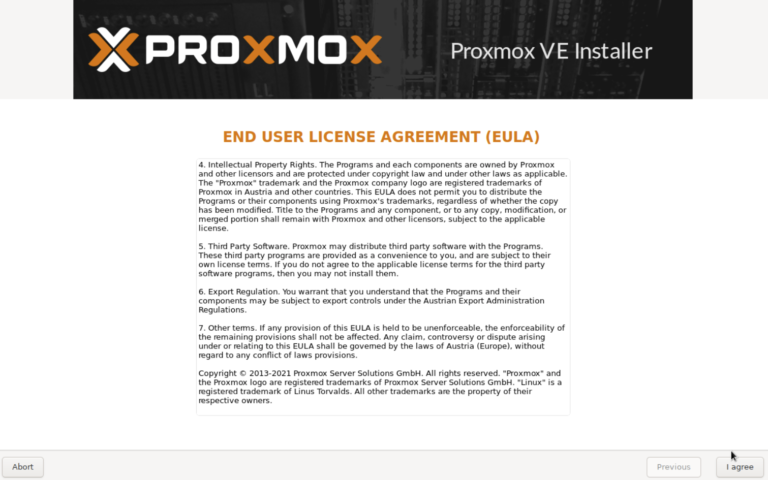
Choose your SSD as target hard disk 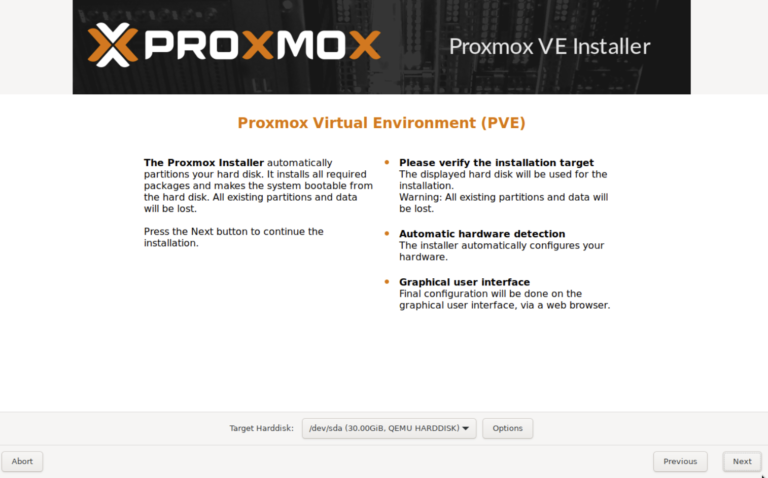
Select country and timezone of your choice 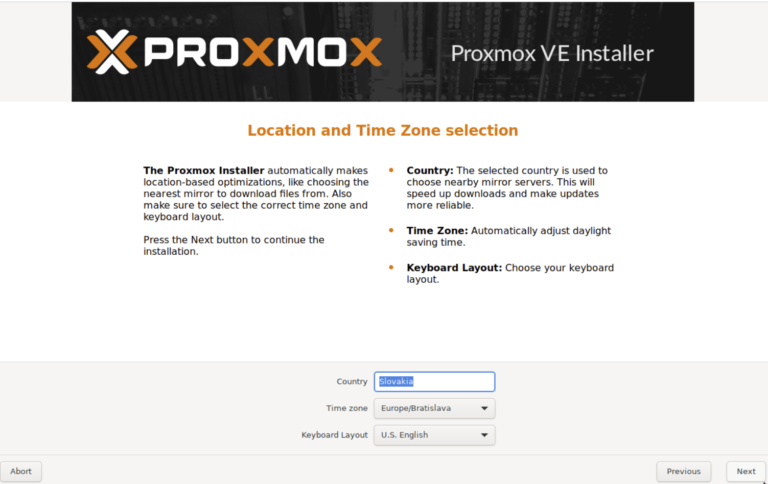
Choose your root password and mail for notifications
Now type out hostname in FQDN (fully qualified domain name) which basically means with the domain you want to use. Mine is thetechcorner.sk so the hostname will look like this. If you don’t own any, you can just use “.home.arpa” which is used for homelab stuff.
Also, choose some static IP address in your range of network. 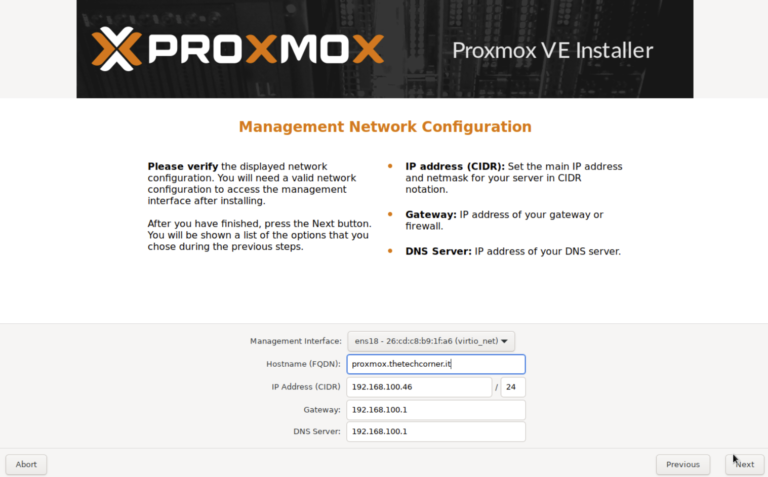
Everything should be set and you can begin the installation. 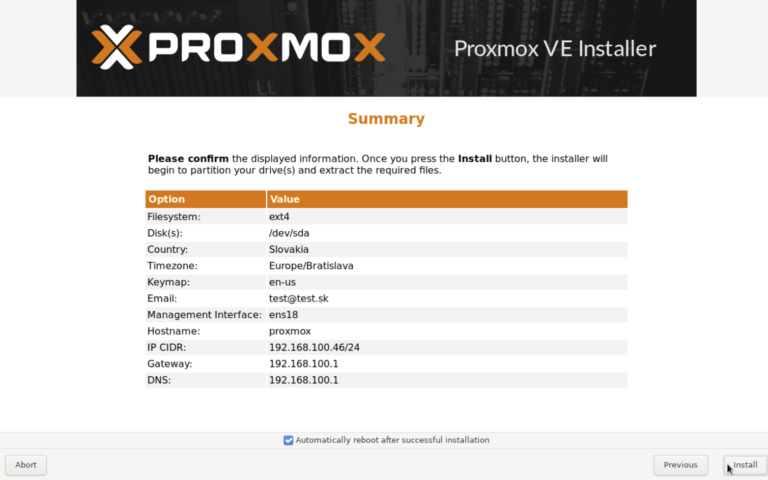
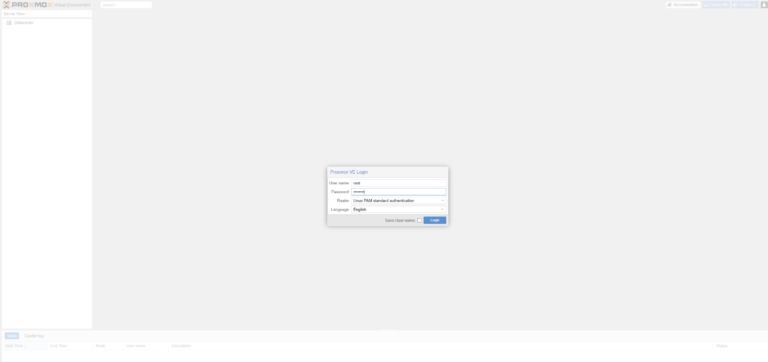
When it’s done, you should see something like this on your screen
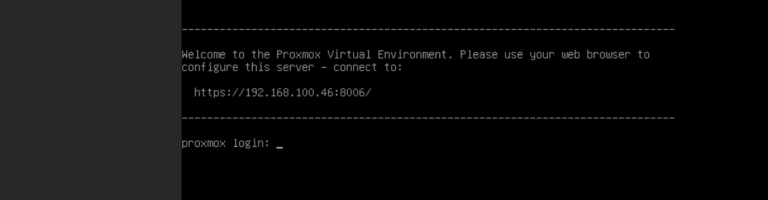
Now open up the browser in your local network and enter the URL.